
How the integration works
AirGuard's platform detects drones and their pilots across RF, Remote ID, and radar sensors. The AirGuard-Skydio DFR integration relays those detections straight into the Skydio Drone First Responder (DFR) Command Center, so your DFR operators see a breach the moment it happens.
The integration is a one-way, push-based link from AirGuard to Skydio Cloud, authenticated with a Skydio API token. When a non-whitelisted drone breaches an AirGuard alert zone with Skydio push enabled, AirGuard creates incident markers in Skydio for the drone and, where available, its pilot or remote controller. Marker positions update as the drone moves and are removed automatically once the flight ends or the drone leaves all Skydio-enabled zones.
Administrators keep control at two levels: a master switch that turns the integration on for the account, and a per-zone toggle that decides which individual alert zones are allowed to trigger a Skydio response.
Requirements
Before you start, confirm you have the following in place.
- An active AirGuard account running V3.22.0 or later
- An active Skydio DFR Command license
- Organization Admin access to Skydio Cloud, to generate an API token
- A Skydio API token with read and write permission on the Markers resource
- Admin role in AirGuard. Sub-Users cannot view or change integration settings
- At least one alert zone configured in AirGuard that you want Skydio to respond to
Part one: create an API token in Skydio Cloud
Done once, by an Organization Admin, in Skydio Cloud.
- Log in to cloud.skydio.com as an Organization Admin and navigate to Settings.
- Under the Developer heading, select API Tokens, then select Generate Token. Name the token (for example, "AirGuard Integration").
- Select the appropriate Groups, then set the permission scopes. The token must include the Markers resource with read and write permission.
- Select Generate, then copy the token immediately. Once you leave or refresh the page, the token cannot be viewed again.
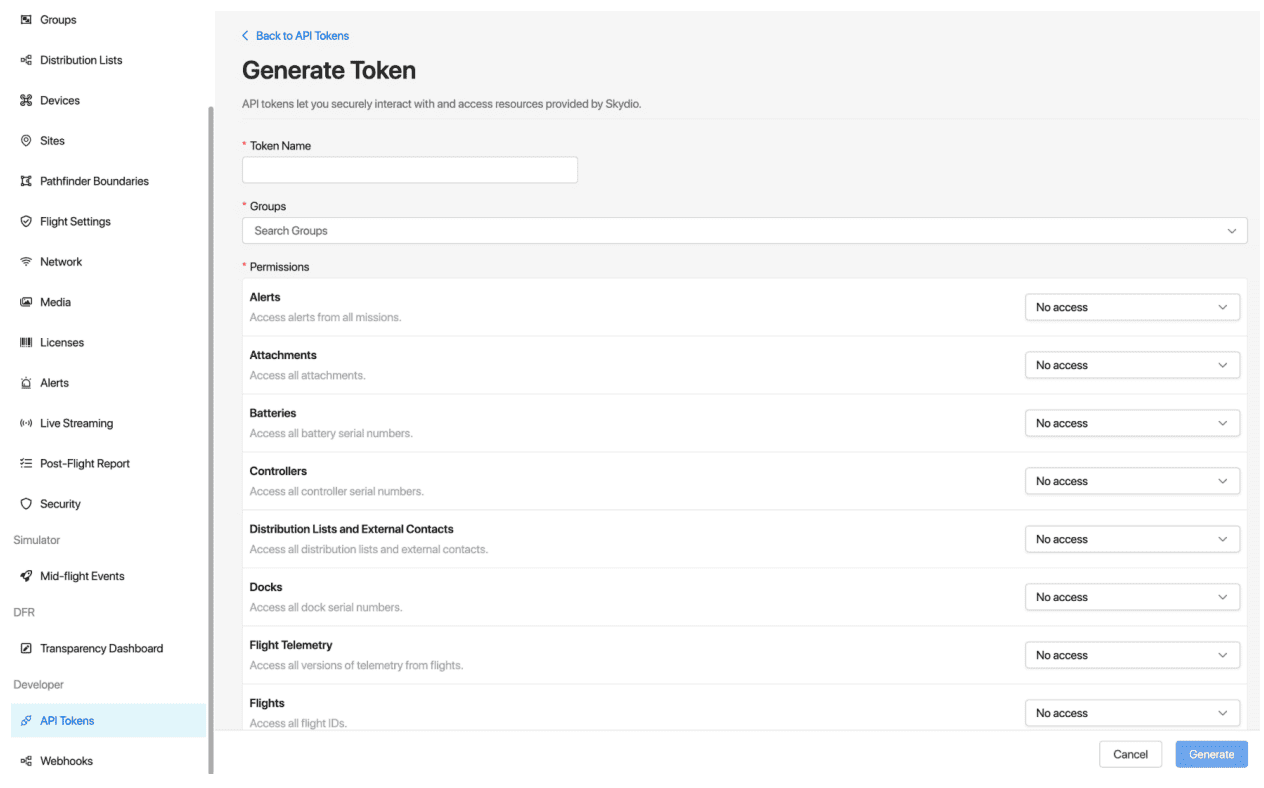
Skydio Cloud — generating an API token with Markers read/write access.
Part two: enable the integration in AirGuard
All three steps below are performed by an AirGuard Admin under Settings › Layers.
Step 1 — Turn on the Skydio DFR integration
In AirGuard, open Settings. Under Layers, locate Skydio DFR and switch the toggle ON. The integration is off by default. Turning it on reveals the Skydio Access Token link directly beneath it.
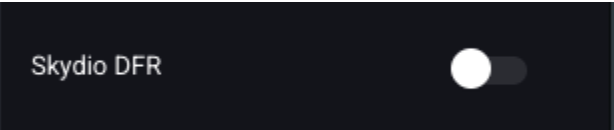
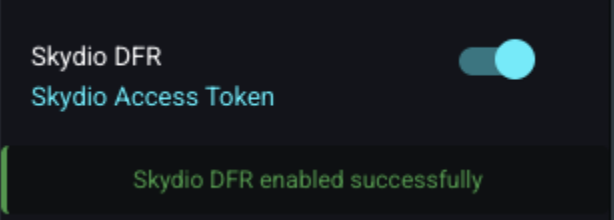
The Skydio DFR toggle in AirGuard, off by default (left) and enabled (right).
Step 2 — Add your Skydio access token
Select Skydio Access Token, paste the token you copied from Skydio Cloud into the Access Token field, and select Save Token. AirGuard validates the token against the Skydio API before saving it. The Status indicator on this screen reports the result:
| Status | Meaning |
|---|---|
| Not configured | No token has been saved yet. |
| Connecting… | AirGuard is validating the token with Skydio. |
| Connected | The token is valid and AirGuard can reach Skydio. |
| Error | The token was rejected. See Troubleshooting below. |
Once saved, the token is masked and is never displayed again in plain text. To replace it, enter a new token and save again.
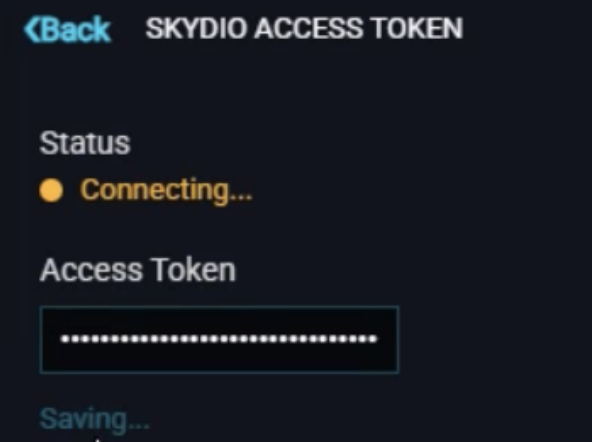
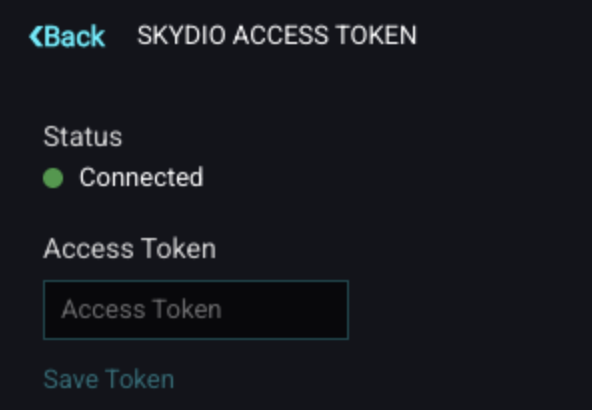
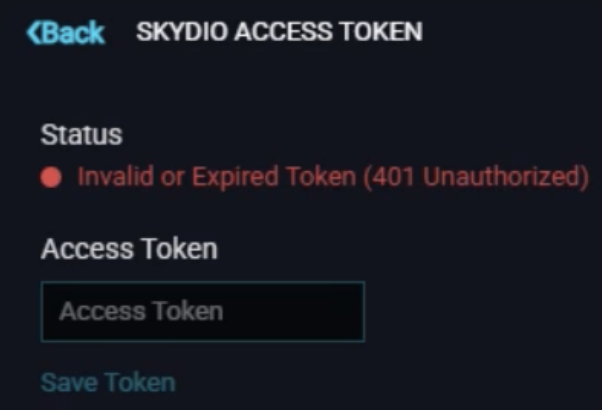
The Skydio Access Token screen: Connecting, Connected, and an invalid or expired token error.
Step 3 — Choose which alert zones push to Skydio
Enabling the integration does not, on its own, send anything to Skydio. You also have to nominate the zones that should trigger a DFR response. Open the alert zone you want Skydio to respond to, and in the Manage Alert Zone panel, switch Send Skydio DFR Events to ON. Repeat for each additional zone.
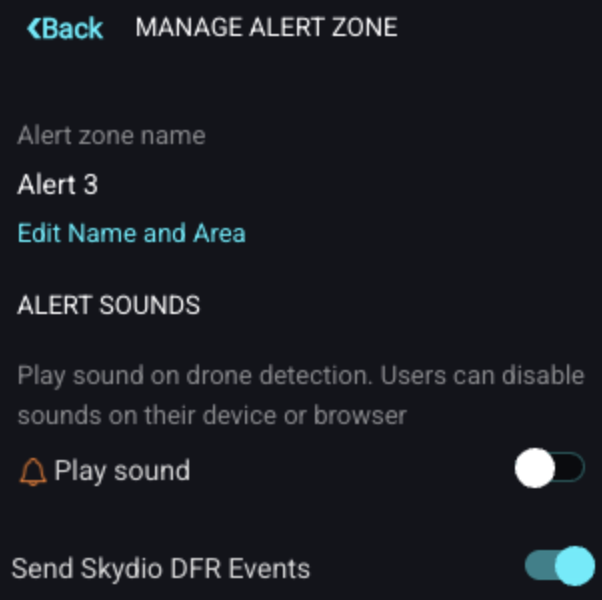
The Manage Alert Zone panel, with Send Skydio DFR Events enabled.
The toggle defaults to OFF for every zone, new and existing, and saves as soon as you switch it. Zones with Skydio push enabled are highlighted in orange on the AirGuard map, so operators can see at a glance which zones will launch a response.
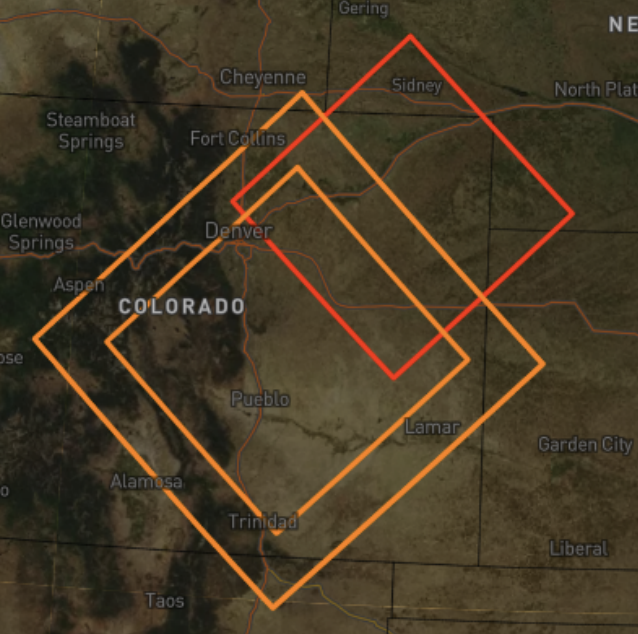
Alert zones with Skydio push enabled appear in orange on the AirGuard map.
What Skydio operators see
When a non-whitelisted drone breaches a Skydio-enabled alert zone, AirGuard creates the following in the Skydio DFR Command Center:
- Drone marker — the drone's live position, with drone ID, make, model, altitude, speed, heading, the alert zone breached, and the detection timestamp.
- Pilot / RC marker — the pilot or remote controller position, with the same flight context. If pilot or controller coordinates are not available, AirGuard falls back to the drone's home position so operators still have a lead to work from.
Markers identify AirGuard as their source. Positions update as the drone moves, and both markers are removed automatically when the flight ends or the drone exits all Skydio-enabled zones.
Validate the integration
- On the Skydio Access Token screen in AirGuard, confirm the Status reads Connected.
- Confirm your chosen alert zones appear orange on the AirGuard map.
- Fly a test drone that is not on the AirGuard whitelist into one of those zones.
- In the Skydio DFR Command Center, confirm drone and pilot markers appear and that their positions update as the drone moves.
- End the flight and confirm the markers are removed from the Skydio map.
Troubleshooting
Status shows an error immediately, without contacting Skydio
The token does not match the expected format. Re-copy it from Skydio Cloud, checking for leading or trailing spaces introduced by copy and paste.
Status shows a 403 / permission error
The token is valid but lacks the permissions the integration needs, or it has been revoked in Skydio Cloud. Confirm the token's permissions include the Markers resource with read and write access, or generate a replacement token and save it in AirGuard.
Validation times out
AirGuard could not reach the Skydio API within the validation window. Check outbound connectivity to Skydio and try again.
No markers appear in Skydio
Check, in order: the Skydio DFR master switch is ON, Send Skydio DFR Events is ON for the specific zone that was breached, the detected drone is not on the AirGuard whitelist, and the detection is a Layer 1 (RF) detection.
Markers stopped appearing after working previously
The most common cause is a token revoked or rotated in Skydio Cloud. Check the Status on the Skydio Access Token screen and re-save a current token.
Scope of this release
- Detection coverage: Layer 1 (RF) detections. Additional detection layers are planned for future releases.
- Direction: One-way, AirGuard to Skydio. Skydio actions do not change state in AirGuard.
- Marker history: Markers represent active incidents only and are removed when the flight ends. Full detection history remains available in AirGuard Records.
- Permissions: Enablement, token configuration, and per-zone toggles are Admin-only in AirGuard.
- Filtering: Whitelisted drones never trigger Skydio markers. Flagged drones continue to trigger markers as normal.
Support
For help with AirGuard configuration or this integration, contact the AirSight Support Team at support@airsight.com, or through your AirGuard customer portal.
Resources: cloud.skydio.com · Skydio API documentation